


There is no BBQ-cooking heartbreak quite like spending fourteen hours managing a firebox, meticulously checking your wrap, waiting out a grueling stall, and letting your brisket rest, only to pull a slice apart and have it crumble like dry firewood. You did everything by the book, but for one reason or another, perhaps a lean flat, an uncalibrated thermometer, or a random spike in pit temp, your brisket turned out dry.
Once the knife has sliced through that beautiful bark, you can't exactly put the meat back on the pit to magically re-render the fat. The moisture loss is already a reality. But before you throw that expensive packer brisket into the trash can, take a deep breath.
In the world of backyard BBQ, we don’t admit defeat; we pivot. You can absolutely rescue dry, sliced brisket and still turn it into the star of your dinner table. Here is your definitive guide on how to fix dry brisket and inject life, fat, and flavor back into your meat after the damage is done.
The most effective, immediate way to rehydrate sliced brisket without turning it into mush is a warm, savory bath. When meat dries out, the muscle fibers contract and squeeze out water. By submerging the slices in a hot, flavorful liquid, you are utilizing capillary action to draw moisture back into those tight fibers.
Don't just use plain water, as that will strip away your hard-earned rub and dilute the beefy flavor. Instead, create a robust beef au jus.
Mix a high-quality, low-sodium beef broth with a tablespoon of Worcestershire sauce and a pinch of your favorite beef dry rub. For an authentic pit flavor, if you have any rendered beef tallow on hand, whisk a tablespoon of it right into the liquid. Warm the mixture in a shallow pan on your stove or pellet grill over low heat.
Slide your dry slices into the liquid. Let them steep on low heat (around 160°F to 170°F) for 5 to 10 minutes. This gives the meat time to absorb the liquid without overcooking it further.

If you have a whole stack of sliced brisket that needs to feed a crowd in an hour, individual soaking might take too long. This is where we look to the classic competition method, often utilized when learning how to smoke brisket correctly, which is the wrap.
Lay down a double layer of heavy-duty aluminum foil. Fan your dry brisket slices out in a single layer, overlapping them slightly like shingles. Now, apply a generous amount of “liquid gold”: liquid beef tallow. If you don't have tallow, melted unsalted butter works as an excellent substitute.
Drizzle about a quarter-cup of beef broth over the top to assist with steaming. Wrap the foil tightly around the meat to trap every drop of moisture. Place the foil packet into an oven or smoker set to 225°F for 20 to 30 minutes. The combination of heat, steam, and fat will coat the dried-out muscle fibers, giving the meat a silky, rich mouthfeel that mimics a perfect cook.
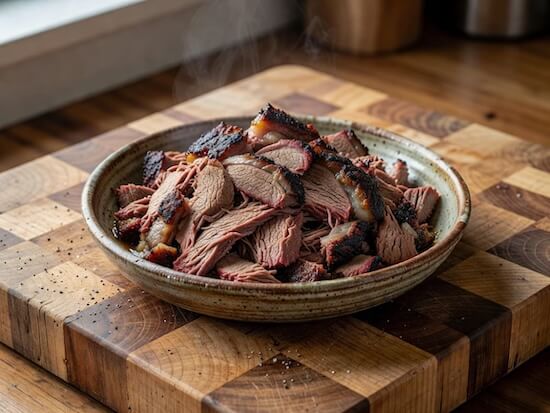
If your slices are so dry that they are falling apart when you touch them, stop trying to serve them as pristine slices. Lean into it. Chop the brisket down into fine pieces. Chopping increases the surface area of the meat, making it much easier to evenly distribute moisture and fat.
Pitmaster Tip: The smaller the chop, the easier it is for the meat to absorb a thin sauce or warm fat without feeling dry to your guests.
Take your chef's knife or a cleaver and chop the brisket flat down. Transfer the meat to a warm bowl. Toss it with a mix of thin, warm barbecue sauce and warm beef broth or tallow. Avoid thick, sugary sauces straight from the fridge; they will sit on top of the meat like glue instead of penetrating the fibers. Serve this up on a toasted brioche bun with pickles and onions for a classic backyard barbecue sandwich.
Sometimes, the best way to fix a dry brisket is to change the menu entirely. Brisket has an incredible smoky depth that cannot be replicated by quickly cooking ground beef or steak. If you find the flat is unsalvageable for slicing, the point (the fattier muscle) may still be perfect for making brisket burnt ends.
According to food safety guidelines from the USDA Food Safety and Inspection Service, as long as your meat was held and cooled safely, it is the perfect candidate for slow-simmered dishes where it can absorb braising liquids over several hours.
| Re-Purposed Dish | Why It Works | Best Liquid Base |
| Smoked Brisket Chili | Cubing the meat and simmering it for hours breaks down any remaining tough proteins. | Beef broth, crushed tomatoes, and beer. |
| Brisket Tacos (Suadero Style) | Frying the chopped brisket in lard or tallow crisps up the edges while reintroducing necessary fat. | Fresh lime juice and beef fat. |
| BBQ Baked Beans | Slicing or dicing the brisket thin and baking it inside a sweet, savory bean liquid keeps it completely hydrated. | Molasses, apple cider vinegar, and bean liquor. |
It is easy to get discouraged when the cook doesn't go as planned, but in BBQ, defeat is a choice. You spent hours building that flavor profile, and a little surface dryness doesn't diminish the incredible bark or the deep smoke ring you achieved. Realizing your barbecue is dry is simply the moment the game changes, not the moment it ends.
By keeping these recovery techniques in your arsenal when it comes to how to fix dry brisket, you ensure that no cook is ever a total loss. Whether you choose the au jus soak, the tallow wrap, or a total menu pivot, you can turn a potential disaster into a delicious success. Take notes, enjoy the revived meal, and remember that every challenging cook is just practice for the perfect one waiting down the road.
If you're tired of guessing your pit temps, fighting the stall, or wrapping at the wrong time, it's time to skip the trial and error.
Here at BBQ Champs Academy, you can learn the exact, step-by-step competition techniques used by World Champion Pitmasters and Grillmasters. Our detailed, high-definition online cooking classes break down fire management, meat selection, trimming, and tracking internal temperatures without guesswork. Stop leaving your backyard barbecue results to luck. Dive into our online BBQ school today, and turn your next brisket into a perfectly juicy masterpiece!
Great BBQ can lose points before a judge even takes a bite. If your box looks messy, uneven, or hard to score, strong cooking won't save it. That's why, if you are looking to level up your competition skills, practicing BBQ competition turn-in boxes at home matters so much.
The good news is you don't need a contest weekend to get sharper. With a simple setup and a repeatable routine, you can build speed, cleaner presentation, and more confidence every time you box meat.
In this article, we break down everything you need to know to master your competition turn-in boxes at home.
Practice works best when it feels close to the real thing. Set up the same white turn-in box each time. Keep gloves, small tongs, paper towels, a sharp knife, and a timer within reach. If your sanctioning body allows garnish, use it. If not, skip it and train the right habit from day one.
Muscle memory comes from repetition, not luck. So use the same box style, the same tools, and the same time limit every round. Let the meat rest, then slice, sort, and box it in the same order.
That steady routine removes panic and establishes a systematic pattern that you almost won’t even need to think about. On contest day, plating should feel like tying your shoes, not solving a puzzle.

Rules shape your box. Garnish rules, portion counts, and box style can change by sanctioning body. Because of that, bad practice can lead to bad habits. So, practice the rules you'll compete under so that you don’t get good at the wrong box.
You don't need to memorize every line today. But still read over the current rules before each training cycle so your reps stay useful.
A strong turn-in box should look calm. Judges should see clean lines, even color, and your best work right away. Think of it like setting a team photo. If one person leans out of line, your eye goes straight to the mistake.
Sort the meat before you build the box. Lay out brisket slices, ribs, chunks, or pieces on a tray and compare them side by side. Look for similar size, even bark, clean cuts, and a moist finish. If one piece is darker, ragged, or dry-looking, set it aside.
Uniformity often beats extra quantity. Six matching brisket slices look stronger than eight mixed ones. The same goes for ribs with uneven bones or chicken pieces with different skin colors. When pieces match, the box feels tighter and more polished.

Place the best side up. Keep rows straight. Leave enough space so each piece reads clearly, but not so much that the box looks thin. You want full, not crowded.
Also, watch the edges of the box. Smudges, fingerprints, and sauce pools pull the eye away from the meat. Wipe the rim. Dab any extra BBQ sauce. Straighten anything that shifted.
Don't try to hide weak pieces by stacking too high. That often creates shadows, crooked lines, and a box that looks busy. Clean presentation wins more respect than clever cover-ups. The goal isn't fancy. The goal is easy to judge in one glance.
One practice run can teach a lot, but only if you study it. After each box, take a top-down photo in the same light and from the same height. Then score appearance honestly and change only one or two things next round.
That kind of focused practice stacks up fast. The more hands-on cooking reps between mock turn-ins, the more effectively you’ll be able to sharpen meat handling and consistency.
Your eyes miss details in the moment. A photo doesn't. It shows crooked slices, empty gaps, messy garnish, dull color, or one piece that looks out of place.
Use the same angle every time so your comparisons stay fair. Over a few weeks, you'll spot patterns. Maybe your brisket rows drift. Maybe your ribs look tight in person but loose in photos. Pictures tell the truth.

Start small. Work on one category at a time: chicken, ribs, pork, or brisket. That makes it easier to fix one issue without extra pressure. Then run a full mock turn-in with a timer. Slice, sort, build, wipe, and photograph under the clock. Bit by bit, your boxing gets faster, cleaner, and more confident. Strong presentation isn't guesswork. It's a skill you build one box at a time.
If your first few boxes look rough, that's normal. Keep the setup the same, make small fixes, and repeat. You don't need a contest weekend to get better at BBQ competition turn-in boxes at home. Set a timer this week and build one practice box. Your next box can already look sharper than the last!
Ready to take your presentation from the backyard to the podium? While consistent practice at home builds the foundation, learning the specific nuances of a winning entry can shave years off your learning curve. At BBQ Champs Academy, our in-depth online cooking classes are taught by Champion Pitmasters and Grillmasters who have mastered the art of the turn-in box. They walk you through every step of the process, from meat selection and trimming to the final plating techniques used at the highest levels of competition.
Whether you are looking to refine your brisket slices or perfect your chicken placement, these expert-led courses provide the insider knowledge you need to impress the judges and level up your skills.
Grab your All-Access Pass today to start learning from the best in the business and ensure your next turn-in is competition-ready.
Pulled your brisket or pork butt at the perfect moment, then panicked because dinner's an hour away and you're wondering how to hold smoked meat in a cooler? A cooler hold keeps BBQ hot, safe, tender, and juicy without cooking it more, when you do it on purpose. Think of it as an insulated rest for resting meat, not a finishing step.
This guide focuses on how to deal with two real risks when holding smoked meat in a cooler: carry-over cooking (meat goes in too hot due to thermal momentum), and heat loss (meat cools for too long).
An insulated cooler can't fix timing mistakes; it only slows them down. Start by pulling meat when it's ready, then calm it before you trap heat. Also, keep your wrapping choice in mind, because it controls bark, juices, and how fast temps move. If you want the "why" behind resting, this breakdown of the science behind resting meat makes it click.
Carryover cooking is simple; the hot outside keeps heating the center after you pull it. For large cuts like brisket and pork butt that you cook low and slow, pull a few degrees early from your usual desired internal temperature. For poultry, pull closer to the final since it carries over less.
Go by feel first. If the thermometer probe slides in like warm butter, you're close. Then use the internal temperature as the guardrail, not the steering wheel.
Let the meat sit unwrapped or loosely tented on the counter for 5 to 15 minutes. You're not cooling it off, you're stopping the aggressive steaming that leads to moisture loss and allowing juice redistribution while muscle fibers relax and connective tissue converts to gelatin.
Next, wrap it tightly. Aluminum foil holds heat best but can soften bark. Heavy-duty foil works well for brisket too. Pink butcher paper breathes and helps keep bark firmer. Add a towel over the wrap for extra insulation.

It’s critical to set up the cooler so that it can hold just enough heat without cooking the meat further. This faux cambro setup gives you a warm, padded "nest" of towels, not a heat trap:
For better reads and fewer guesses, every pitmaster should brush up on using probes for resting and hold temps.
Skip boiling water. It's easy to spill, and it can warp cheaper coolers. Hot tap water is plenty to bring the cooler to the optimal temperature before lining it with towels.

Empty space cools fast. Towels act like insulation and keep temperatures steady. If you're holding two cuts, separate them so one isn't overheating the other.
Monitor the internal temperature to keep hot-held smoked meat at 140 degrees or higher. Most cooler holding times run 2 to 4 hours, and big cuts can go longer in a high-quality cooler.
Remember: If you keep opening the lid, you're basically "venting" your hold on purpose.
If the internal temperature drops below 140 degrees and sits in the danger zone, this compromises food safety, so reheat to 165°F before serving.
If temps keep rising, crack the lid for a few minutes. You can also unwrap briefly, then rewrap and return it. Finally, slice only when you're ready to serve, because sliced meat leaks moisture fast.
To hold smoked meat without overcooking, pull a touch early, vent for a few minutes, then wrap tightly. Preheat and towel-line the cooler, pack out empty space, and monitor temps when you can. Keep the meat above 140 degrees, and don't keep checking like a kid shaking presents. Done right, mastering how to hold smoked meat in a cooler buys serving-time flexibility while keeping your BBQ tender and juicy in true pitmaster fashion.
Ready to take your backyard skills to a professional level? If you want to stop guessing and start obsessing over perfect results, it’s time to step up your game with our online BBQ cooking classes. At BBQ Champs Academy, you get an exclusive seat at the table with world-class pitmasters who share the competition-level secrets you won’t find anywhere else.
From perfecting your trim to mastering fire management, our virtual BBQ classes provide a deep dive into the techniques that win championships. Don't just cook, transform your craft and start smoking like a pro. Grab your All-Access Pass today!
Regular salsa tastes fresh and bright, but bold, homemade smoked salsa tastes like it spent the afternoon near the fire. The tomatoes get sweeter, the onions soften, and the peppers pick up a gentle char that makes every chip taste better.
If you’ve been wondering how to make smoked salsa without turning your veggies into soup, the good news is it’s repeatable on a backyard smoker or pellet grill. Nail the prep, keep the smoke clean, and you’ll get a batch you’ll want on grilled tacos all week.
In this article, we’ll break down the best pro tips on how to smoke salsa that bursts with bold, delicious flavor, eliminating the chances of trying to make bitter, watered-down results work.
Great smoked salsa starts at the cutting board. Use firm produce so it holds shape through the cook, and keep seasoning simple so the smoke has room to speak. A light coat of high-heat oil helps smoke cling, but too much turns the surface greasy and mutes flavor.
Roma tomatoes are the workhorse because they’re meatier and don’t flood your blender. Beefsteaks can work, but they often need a drain later. White onion gives a sharper bite; red onion leans sweeter once smoked. Want heat control? Split your peppers and remove seeds and ribs for a milder heat; leave some in for punch. Bell peppers are a smart addition for sweetness, and tomatillos make an easy green salsa twist.

When it comes to cutting the vegetables, halve the tomatoes, quarter the onions, and split the peppers lengthwise. Place veggies cut-side up so they don’t dump juices onto the grate right away. Toss everything with a little olive oil, salt, and pepper to lock in flavor early. For garlic, smoke peeled cloves for a stronger hit, or smoke a whole head and squeeze out the soft paste at the end.
Clean smoke is the whole point. Thick, dirty smoke tastes bitter fast, especially on tomatoes. To maintain the perfect smoke, do this, not that:
Start at 225°F for 90 to 120 minutes. You’re done when everything is soft, with edges just starting to dry, not shriveled. If your cooker has hot spots, rotate the tray once halfway through. On small veggies, as mentioned above, a perforated pan or basket rack saves you from losing pieces to the fire.
Apple or oak stays mellow, hickory tastes classic, and mesquite works only in small doses. To keep tomatoes from drying out, add a water pan, especially on pellet grills and vertical smokers, where airflow can be aggressive.

This is where homemade smoked salsa goes from “pretty good” to can’t-stop-eating. Let the vegetables cool, then blend with intention. Don’t dump all the smoked juices in at once, or you’ll get watery salsa.
Quick fixes if it’s off:
Cool 10 to 20 minutes before blending. Pulse 5 to 10 times for chunky; blend longer for smooth. Blend in stages: tomatoes first, then peppers, onion, and garlic, then cilantro and lime last. Save the smoked juices and stir them back in a spoonful at a time.
Balance is simple. Lime brings brightness, salt makes it pop, and a tiny splash of vinegar adds tang. A small pinch of MSG is optional, but it boosts umami fast. Don’t over-smoke past two hours, and don’t blend hot; it turns thin. Rest in the fridge 12 to 24 hours for the best flavor.
Smoked salsa is easy when you control the details: sturdy cuts, 225°F heat, clean smoke, and smart blending. Let it rest overnight, and it will taste even better the next day. Try a batch on your next taco night, then tweak the heat and texture until it’s exactly how you like it. Pair your homemade smoked salsa with perfectly grilled taco fillings for an easy, unforgettable meal that will have the whole family asking for seconds.
Ready to elevate your BBQ game even further? Whether you are a backyard barbecue enthusiast or an aspiring pitmaster, here at BBQ Champs Academy, we offer exclusive, in-depth training from world-champion BBQ legends. In our online BBQ classes, you'll learn everything from advanced flavor profiles to professional-grade cooking techniques that can't be found anywhere else. Join our community today to unlock your full potential on the grill and start cooking like a champion! Check out our Championship Backyard Barbecue Classes or grab your All-Access Pass for full access to level up your barbecue game like never before.
During outdoor grilling, your kid hears the sizzle, smells the smoke, and suddenly they’re right beside you saying, “Can I help?” That excitement is pure gold, but the grill isn’t a toy, it’s a hot workspace.
With a simple plan at summer cookouts, your pitmaster in training can learn real skills without getting too close to danger. The secret to happy, safe kids grilling is steady supervision and clear roles, so everyone knows what to do and where to stand.
In this article, we’ll dive into how you can safely include your kids in your next grilling endeavor and pass down the joy and deliciousness of outdoor cooking.
Before food hits the grate, start with these grilling safety tips by setting expectations like you’re teaching bike rules: simple, repeated, and explained with a “why” to prevent burn injuries or smoke inhalation. Tell kids the grill is like a campfire with knobs; it can be friendly, but only if we respect it.
Make two non-negotiables while you supervise children: kids don’t touch the grill lid or controls on gas grills, charcoal grills, or propane grills, and they don’t carry hot tools. You’ll also want a calm plan for flare-ups caused by grease buildup or other fire hazards (keep a fire extinguisher nearby, close the lid, move food, turn heat down). Teach them to stop, drop, and roll as a quick response if clothes catch fire.
If you want a quick refresher, keep these essential BBQ safety tips in your back pocket.
Pick a clear line, chalk on the patio or a strip of tape works. The “kid zone” or safety zone is where they stand and talk to you. The “hot zone” or kid-free zone is the grill area, side shelves, and tool traffic.
A simple rule is 3 big steps back from the grill edge. Turn pan and pot handles in, keep cords out of reach, and store lighters, lighter fluid, and other flammable materials up high. Dress for the job: closed-toe shoes, tied-back hair, and no loose clothing or sleeves.

You run the grill. Kids support the cook. Think of them as your prep crew on a weeknight. Here are specific grilling jobs based on age:
They can rinse veggies, tear lettuce, place buns in a basket, set a timer, bring spices to the table, and wipe a clean prep area. Use constant supervision, and only use a step stool at a cool counter.
Skip sharp knives unless you’re right there. Try a butter knife for soft foods, a kid-safe nylon knife, or do slicing yourself. They can measure rubs, mix sauce, skewer soft items with blunt skewers, label foil packets, and load a tray. One rule stays firm: no reaching over the grill, ever.
Now you can build confidence with BBQ tools and timing. Let them read an instant-read thermometer, log cook times, learn carryover cooking, and practice safe tool handoffs with long tongs. They only flip or move food, or safely plate hot foods, when you say it’s safe, helping prevent burn injuries.
Kids learn faster when the wins are small and real, like nailing the timer or calling out temps. Equip them with heat-resistant gloves to build good habits around tool safety. That’s how a pitmaster in training starts thinking like a cook, not a spectator. Over time, kids grilling becomes less “helping” and more teamwork.
Try: “Hot behind you” and “Hands back.” Keep a mini checklist: wash hands, tools ready, plate for raw, plate for cooked, timer on. This routine helps prevent grill-related injuries.
Hot dogs, burgers, veggie skewers, pineapple rings, and foil-packet potatoes are forgiving. Chicken thighs are great too, but the adult should handle them. Save sugar-heavy glazes for the end to reduce flare-ups, and start on lower heat, then finish hotter if needed.

Safe kids grilling isn’t about making the grill scary; it’s about clear zones, small jobs, and steady coaching, including a post-cook safety routine like extinguishing charcoal properly and allowing time for cooling the grill. Start this weekend with one rule, one task, and one easy food, then add skills as they’re ready. Your pitmaster in training is already watching; give them a safe way to grow into it and avoid burn injuries, one cookout at a time.
While teaching your kids the safety basics is the first step, the best way to inspire the next generation is by mastering the craft yourself. At BBQ Champs Academy, our in-depth, one-of-a-kind online BBQ classes give you direct access to the secrets of world-class pitmasters. We don’t just teach you how to cook; we give you the expert knowledge and professional techniques you need to turn every backyard cookout into a masterclass for your family.
By leveling up your skills today, you’re building a legacy of flavor and tradition that you can proudly pass down to your children for years to come. Don’t wait to become the ultimate grill master, grab your All Access pass now and start your journey to BBQ greatness!
Headed to the mountains this fall or winter? If you’re not used to it, high-altitude grilling can throw you a curveball with longer cook times, weak sears, dry chicken, and a brisket stall that feels endless. The good news is you can beat all of that with a simple plan.
In this article, you’ll learn why your grill behaves differently above 3,000 feet and how to adjust cooking time, heat, and fuel so your food turns out right. We’ve got clear tips you can try today, no matter if you’re at 3,000 feet or 10,000 feet.
Grills act differently at higher altitudes because the air is different. As air pressure decreases, the boiling point of water drops. That means moisture turns to steam at a lower temperature. Food dries faster because liquids evaporate more rapidly, sauces tighten sooner, and proteins can overcook if you use your sea level routine.
Thinner air also carries less oxygen. Fuel needs oxygen to burn hot. With low oxygen, flames can be weaker, recovery is slower after you open the lid, and you may notice uneven heat. Pellets, propane, and charcoal all feel this effect, just in different ways.
The weather at altitude adds another layer. Colder temps pull heat from your cooker. Wind strips warmth and blows smoke and heat out of the vents. Dry air speeds evaporation, so moisture leaves the meat faster, especially during longer cooks.
These simple shifts create a pattern, faster moisture loss and slower heat recovery. The fixes are practical. Preheat longer, bump your target temps a bit, protect your cooker from wind, and keep extra fuel around. (More on all of this below.)
At 7,500 feet, water can boil near 198°F due to lower air pressure. That is well below sea level boiling and creates a lower boiling point. Surface moisture flashes off sooner, so chicken skin can dry before it crisps and sauces thicken faster, leading to the risk of dry meats. Plan for a touch more fat, a little added moisture, or a quicker wrap on long cooks to maintain moisture and protect texture and flavor. Keep the approach practical, not fussy.

Charcoal, pellets, and gas all need oxygen for combustion to run hot. The same vent setting or burner knob position that roars at sea level may run cooler up high in thinner air. This is why small adjustments matter. Open vents a bit more, preheat longer, and be ready to bump temps to hit the same sear and color you expect.
Mountain air steals heat fast. Use a wind break, keep the lid closed, and avoid placing the grill where gusts hit the vents. Dry air speeds evaporation, so help your food along with water pans, brines, or oil-based marinades.
Keep it simple when grilling at high altitudes. Make small changes, measure with a thermometer, and repeat what works. Food safety temperatures never change, so trust internal temps, not the clock. Here are some effective time and heat adjustments for high-altitude grilling:
Using the two-zone cooking method helps manage direct or indirect heat effectively. Preheat longer: Charcoal, 20 to 30 minutes. Gas or pellet, 15 to 20 minutes.
Aim hotter by 25 to 50°F at the grate to match sea level sear, since lower temperature norms at sea level won't cut it in thin air.
Choose moderate thickness. Use thinner steaks or butterfly chicken breasts if timing slips. This helps crust development even when the air is thin and cold.
You have two easy paths. Keep your usual temp and add time, or raise the pit temp a bit and keep close to your normal timing.
Pick one method and stay consistent. Track results and adjust next time.

Use water pans to help the bark set while still keeping the meat moist. Wrap a touch earlier than at sea level once the bark looks right. For brisket, wrap it at around 155 to 160°F internal temperature. Keep your pit steady at 235 to 265°F. Expect a slower recovery after lid openings and a longer meat stall.
Rely on a meat thermometer to check internal temperatures to determine doneness, regardless of altitude. Here are the internal temperatures you should be aiming for:
Remember, let the meat rest after it comes off the grill. Juices settle, and texture improves.
Dial in airflow, fuel use, and moisture control. A few small tools and habits make a big difference:
Thinner air needs more airflow for effective charcoal grilling. Open intake and exhaust slightly more than at sea level. Use a full charcoal chimney to light a hot, clean fire. Lump charcoal burns hotter and faster; briquettes hold a steady burn. Plan on 10% to 25% more fuel, especially on cold or windy days.
For gas grills, check the regulator and keep burners clean for a steady flame; pay attention to regulator pressures and consider orifice adjustments since they can run differently at elevation. With propane grills, give the cooker more time to preheat and warm the grates. For pellets, use fresh, dry pellets and consider running 15 to 25°F hotter than usual. Keep the lid closed to reduce heat loss. After opening, give the pit a minute to recover before judging temps.
These steps help your meat hold onto tenderness when the air is dry.

Set up so the wind does not blow straight into the vents. Use a simple wind shield if needed. Keep the cooker out of gust paths and off exposed corners. Before you go, run a quick checklist. You should have on hand:
At altitude, you battle lower boiling points, thinner air, and tougher weather. The fix is simple. Preheat longer, add a small heat bump, allow more time, and bring extra fuel. Try one or two changes on your next high-altitude grilling session and take notes to dial in your grill. Save this guide, and share it with a friend who cooks in the mountains. Here’s to mastering grilling for warm fires and great food, no matter the altitude or challenges of cooking at higher elevations.
Tired of guessing the perfect techniques for your cookouts? Ready to truly master the art of grilling? The unique online BBQ cooking classes here at BBQ Champs Academy connect you directly with the world's top Pitmasters and Grillmasters. You'll unlock insider techniques and strategies for smoking and grilling that will elevate your outdoor cooking. Start your journey to pitmaster success and grab all the professional secrets with an All-Access Pass today!
Nothing beats the satisfaction of a perfectly smoked brisket or a plate of sticky ribs straight off the grill. For many backyard grillers, the magic doesn't stop when dinner ends. The leftovers can be just as exciting—if you know how to store and reheat BBQ to keep it just as moist, tender, and flavorful as it was on day one.
Understanding a few smart storage and reheating strategies will help make every bite worth savoring, whether you're prepping weekday sandwiches or planning a next-day feast.
In this article, we'll break down the best practices for exactly how to store and reheat BBQ safely and effectively without losing any of that delicious flavor.
Keeping BBQ at its peak is all about preventing dryness and preventing spoilage. Timing and technique matter. As soon as your cookout winds down, it’s important to get those leftovers cooled fast. The longer smoked meat sits out, the more you risk food safety and texture loss.
Choosing the right container is essential for protecting your leftovers from the air. For best results:
For those who love classic pitmaster techniques, consider wrapping smoked meats in butcher paper. Pink butcher paper lets the meat breathe, keeping the bark from getting soggy, and is a favorite among BBQ pros.

Here’s a handy guide to how long each type of BBQ stays at its best:
|
Meat Type |
Fridge (≤40°F) | Freezer (≤0°F) |
| Brisket | 3-4 days | 2-3 months |
| Ribs | 3-4 days | 2-3 months |
| Pulled Pork |
3-4 days |
2-3 months |
| Chicken | 3-4 days | 1-2 months |
| Sausage | 3-4 days | 1-2 months |
Don’t gamble with food safety when it comes to your BBQ. Watch for these changes before reheating any leftovers:
When in doubt, toss it out!
Reheating BBQ is a balancing act. Too much heat, and your juicy brisket can turn tough and dry. Too little, and you risk uneven warming. Each technique has its strengths, depending on the type of meat and its size.
Oven reheating is a go-to for big cuts and batch meals. It gently warms BBQ without zapping the internal moisture.
Steps:
Pros: Even heat, less drying.
Cons: Takes longer, uses more energy.
Want a little fresh char or to revive bark? Use the grill to add smokiness and texture.
Steps:
Pros: Crisp edges, smoky flavor.
Cons: Can dry out thinner cuts if not watched closely.
Sous vide works wonders for keeping meats juicy. If you have a sous vide wand, put your BBQ in a vacuum-sealed (or tightly zipped freezer) bag and heat it in water at 155°F for 45-60 minutes.
Pros: Nearly foolproof, even reheating, best moisture retention.
Cons: Requires special gear and a longer setup.

Source: ThermoWorks
Microwaves are quick but can zap moisture fast. Use short bursts and cover the meat with a damp paper towel or microwave-safe lid.
Steps:
Pros: Speed.
Cons: Can make BBQ rubbery if overheated.
Plenty of leftovers don't reheat perfectly, but that's not the end of their flavor. If your reheated BBQ seems a bit lackluster, try turning it into something new. Explore some creative BBQ leftover ideas for fresh inspiration that give new life to yesterday’s meal.
Learning how to store and reheat BBQ unlocks more from every cookout. Fast, airtight storage and gentle reheating protect moisture and flavor. With a few simple steps, your brisket, ribs, and pulled pork can taste just as amazing on day two as they did fresh off the pit.
Even when reheating isn’t perfect, you can always mix things up with creative leftover recipes. Next time you fire up the smoker, rest easy—great BBQ doesn’t have to be a one-night-only affair. Grab your containers, keep an eye on the clock, and keep that smokehouse magic alive all week long.
Ready to elevate your BBQ skills and impress everyone at your next gathering? Here at BBQ Champs Academy, we offer unbeatable online courses led by award-winning pitmasters and grillmasters. You’ll learn everything from the basics of smoking to pro-level techniques for perfect results every time.
Start your journey to becoming a backyard hero. Get your All-Access Pass now and transform your cooking!
Infusing your favorite spices with a touch of rich smoke can elevate their flavor to a deliciously new level. Smoked spices are gaining popularity among barbecue enthusiasts who want a personal, bold flair on everything from perfectly cooked ribs to roasted vegetables. By smoking your own spices, you control the strength, the blend, and the flavor notes. It’s cheaper, fresher, and far more satisfying than anything from a jar.
Ready to add homemade smoked spice blends to your barbecue lineup? Here’s a straightforward guide on how to smoke spices at home, complete with tips that’ll help ensure you do it perfectly every time.
Before firing up your smoker, start with the right gear and the best ingredients. The process doesn’t require fancy equipment—a little creativity goes a long way.
Different types of smokers bring different results. Here’s what you need to know:
Tray or Foil? Lay whole or coarsely ground spices in a thin layer on a metal tray for best airflow. Don’t have one? Create a basket with heavy-duty foil, poked with holes for smoke to reach the spices.
No matter the setup, make sure your smoker is clean and has good airflow. Keep a close eye—spices are prone to absorbing off-flavors from old residue.
Not every spice takes to smoke the same way. Think big flavor and low moisture for best results. Popular picks include:
Whole spices handle heat better and soak up smoke slowly, giving a clean flavor. If you need to use ground spices, keep them in a single, thin layer and watch closely to prevent burning.

Smoking spices isn’t complicated, but attention to detail makes a world of difference. Here’s how to turn your favorite spice into a delicious feature in your BBQ cooking:
For a twist, experiment with smoking with fresh herbs to infuse even more complex flavors. Herb-infused smoke can elevate a basic blend into something restaurant-worthy.
Patience rewards you with a deep, even smoke flavor that is free from bitterness.

Source: allrecipes.com
Once your spices cool, it’s time for the fun part—blending and storing:
How to smoke spices is simpler than you think, and the payoff is a flavor you won’t find in any store. With the right equipment, carefully chosen ingredients, and a bit of patience, your homemade blends can rival those of top BBQ joints. Trust your nose, watch your temperatures, and experiment with different woods and herbs.
Soon, your spice cabinet can become your favorite part of backyard barbecuing. Try a new wood, blend unexpected ingredients, and watch your barbecue soar. Your next cookout will never taste the same.
Want to become a master of the pit? BBQ Champs Academy offers comprehensive online courses taught by champion pitmasters and grillmasters. From foundational smoking techniques to advanced low-and-slow cooking methods, our in-depth instruction will equip you with the skills you need.
Unlock your full potential and dominate your next cookout! Grab your All Access Pass today.
The rise of the BBQ platter board, also called a BBQ charcuterie board, has turned backyard cookouts into flavor-packed showcases. Nothing captures the excitement of grilling like a generous board piled high with smoked meats, zesty cheeses, and colorful sides. It’s part showpiece, part sharing feast.
From the sizzle of perfectly smoked brisket to the crunch of pickled veggies, each bite is an invitation to explore new combinations. If you want to wow your friends with smoky creativity, a BBQ platter board is your ticket to an unforgettable gathering.
In this article, we’ll break down exactly what you need to know to create a show-stopping spread.
An impressive BBQ charcuterie board requires a mix of proteins, textures, and colors. It’s all about contrast—tender ribs beside tangy slaw, juicy sausages paired with soft cheeses, and bites that keep guests reaching for more.
Variety isn’t just for looks. It makes your platter board more inviting and helps you please a crowd with different tastes. When you offer a smart blend of classic and unexpected ingredients, every bite feels like a new adventure waiting to happen.
Proteins are the heart of every BBQ platter board. Sticking with crowd-pleasers like brisket, ribs, pulled pork, and smoked chicken always delivers. These cuts offer big flavors that stand up well to the other board elements.
To take things up a notch, mix in rare and lesser-known options. Smoked sausage links, burnt ends, or even lamb chops can surprise your guests. For those curious about going beyond the basics, check out these uncommon meat cuts for inspiration. The less common cuts, when cooked right, can become the star of your platter and give your board a custom touch that people remember.
The right cheese will hold its own against bold BBQ flavors. Smoked gouda, sharp cheddar, blue cheese crumbles, or pepper jack bring creamy notes that balance out the richness of the meat.
Sides should cover both hot and cold, crunchy and smooth. Think classic cornbread, grilled corn wheels, pickles, or even a vinegar-based slaw. Roasted or smoked nuts, charred veggies, and quick-pickled onions add flavor pops and brilliant color. Toss in a few bread options—sliced baguette, Texas toast, or even BBQ-flavored crackers—to help scoop up all the goodness.
Consider small bowls of BBQ sauces, sweet and spicy mustards, or aioli. They let your guests customize every bite.

Bringing your BBQ platter board to life means thinking about both how it looks and how it works at the table. It’s not just about flavors, but about feeling welcome to taste, sample, and share:
Layering is key. Start with your largest proteins in the center or in bold clusters. Arrange sliced meats in loose stacks or fanned-out patterns. Fill spaces with sides, cheeses, and accents. Mix shades of red, yellow, and green for instant eye appeal. Varying the heights—using small bowls or piles—adds a sculpted look.
Balance is important for both flavor and practicality. Don’t pile all the meats on one end or tuck all sides in a corner. Spread out salty, sweet, smoky, and tangy flavors, so each area of the board offers unique combos. Sprinkle in fresh herbs, sliced citrus, or edible flowers for a special touch. Everything on the board should feel easy to grab and share.
To help create the perfect BBQ platter board:
Planning the right amount is just as important as choosing your ingredients. For a practical guide, read the tips in our BBQ serving size guide to avoid running short or wasting food. Adjust based on your crowd’s appetite, but aim for a balance so everyone gets to sample each element.

A BBQ platter board isn’t just a meal, it’s an experience. It’s where smoky meets spicy, crunchy meets creamy, and friends become fans of your grilling prowess. Mixing classic favorites with new discoveries makes your board both comforting and exciting. Don’t be afraid to shake up your combinations and add your own twists. Try different cuts, surprise your guests with unexpected cheeses, or bring in seasonal veggies. Use your next cookout as a chance to build a BBQ charcuterie board that’s as fun to look at as it is to eat.
If you’ve created your own showstopping board, share a photo or tip in the comments below—a little inspiration goes a long way in the world of backyard BBQ!
Dreaming of serving up delicious barbecue that makes your whole neighborhood jealous? Ready to turn simple ingredients into smoked perfection? With the exclusive online classes here at BBQ Champs Academy, you can hone your craft directly alongside legendary pitmasters and grillmasters.
Our expert-guided courses cover everything, whether you're just learning to light the coals or you're a seasoned pro aiming for competition glory. Master essential skills like choosing and prepping your meats, all the way up to finessing those advanced techniques. Stop just grilling and start mastering the fire!
Grab your All-Access pass today and start your journey to becoming a true BBQ champion!
Wagyu beef has a reputation that's hard to ignore. Its buttery texture and unparalleled marbling make it the crown jewel of the grilling world. But let’s face it: this premium cut often comes with a price tag that has backyard BBQ enthusiasts second-guessing their choice. Thankfully, you don’t need to max out your budget to enjoy Wagyu beef on the grill. With the right strategies and a bit of know-how, you can savor the luxury of Wagyu without emptying your wallet.
In this article, we’ll cover five great ways you can grill Wagyu beef affordably, along with some essential pro tips you need to know.
Wagyu beef is renowned for its incredible marbling, which leads to meat that melts in your mouth. This marbling doesn’t just make it delicious — it also makes Wagyu ideal for grilling. The fat within the meat caramelizes as it cooks, creating a rich, smoky flavor that’s hard to replicate. Whether cooked rare or closer to medium, the meat remains juicy, tender, and full of depth that ordinary cuts simply don’t offer.
If you're worried about cost, focus on the more affordable cuts of Wagyu like skirt steak, sirloin, or ground beef. These options still offer excellent marbling and flavor but come at a fraction of the cost of pricier ribeye or strip steaks. These cuts work incredibly well for grilling and open up opportunities to create standout dishes without overspending.
Grilling Wagyu beef doesn’t have to mean cooking the whole filet. By using creative approaches, like the ones below, you can stretch smaller portions for big flavor and satisfaction:
Instead of traditional steaks, consider smoking smaller portions of Wagyu brisket, like just the point. These "bites" offer a deeply flavorful experience at a fraction of the cost. Start by trimming any excess fat cap, then generously season the brisket pieces with a simple salt and pepper rub. Smoke the brisket low and slow over indirect heat, using wood chips like hickory or oak for a rich, smoky flavor.
Once tender, cut the brisket into bite-sized pieces and serve them as appetizers or as part of a larger meal. This method allows you to enjoy the melt-in-your-mouth texture and intense flavor of Wagyu without needing a large, expensive cut.

Ground Wagyu beef is a cost-effective way to enjoy its signature taste. You don’t need fancy toppings or a lot of sauce; the meat does the work for you. Form the patties with a gentle touch to maintain their tenderness. Aim for a slightly thicker patty to ensure a juicy interior. Grill your burger patties over medium heat and resist the urge to smash them down — keeping the juices inside is key.
A soft brioche bun, a slice of sharp cheddar, and a simple spread like garlic aioli make the perfect pairing, complementing the richness of the Wagyu without overpowering it.
Get more bang for your buck by making Wagyu kebabs on skewers. Cut smaller chunks of Wagyu and alternate them on skewers with vibrant veggies like bell peppers, red onion, and zucchini. The veggies soak in the flavors of the meat while adding bulk to the meal, making this both delicious and affordable.
Grill the kebabs over medium-high heat, turning occasionally, until the meat is cooked to your liking and the vegetables are tender-crisp. Serve them with a side of rice or a light salad for a complete and satisfying meal.
Tacos are a great way to stretch a smaller portion of Wagyu beef. Use slices from a well-marbled skirt steak or sirloin, and grill them just right. Briefly marinate the steak in a blend of lime juice, chili powder, and cumin for an extra flavor boost before grilling.
Pair the beef with simple toppings like grilled queso fresco, finely chopped onions, fresh cilantro, and a generous squeeze of lime, letting the Wagyu’s rich flavor take center stage. Warm corn or flour tortillas are a must, and a bit of your favorite salsa adds a refreshing kick.
Hosting a BBQ party? Wagyu sliders are the way to go. Mini burger patties made from ground Wagyu pack all the punch of a regular burger but in bite-sized servings. Guests will love the flavor, and you won’t break the bank serving them. Add a touch of smoked gouda or caramelized onions for an extra layer of indulgence. Consider toasting the buns lightly for added texture.
Serve them with a variety of dipping sauces, like a chipotle mayo or a tangy barbecue sauce, to allow guests to customize their sliders. A side of crispy sweet potato fries makes a perfect accompaniment.

Making the most of Wagyu beef on the grill doesn’t just stop with the cut you choose or how you cook it. Here are a few expert techniques that can elevate results while keeping costs manageable:
Precision is everything when grilling Wagyu. Its high-fat content cooks quicker than other cuts, so controlling your grill’s temperature is vital. Too much heat can cause flare-ups and scorch the meat, wasting those flavorful fats.
Serving Wagyu in smaller portions not only stretches your budget but also lets everyone savor a high-quality piece. For example, a single steak could serve as the centerpiece for a shared platter rather than a single meal.
Wagyu beef has a distinct, rich flavor that doesn’t need much enhancement. A sprinkle of salt and pepper often does the trick, allowing the natural umami to come through. Avoid overpowering marinades — a light touch is all it takes.
Your grilling setup can play a massive role in getting the best results with Wagyu. Thinking about upgrading or fine-tuning your technique? Here’s how to make your grill work harder for you:
A clean grill isn’t just about appearance — it impacts flavor too. Greasy buildup can ruin Wagyu’s delicate taste. Regularly scrub the grates and check for spots that don’t heat evenly.
Grilling Wagyu beef on cast iron enhances its flavor and creates an even sear. Cast iron retains heat beautifully, ensuring each piece of beef cooks consistently. Want your Wagyu to truly shine? Read our article on the secrets of grilling with cast iron for pro-level tips.

Grilling Wagyu beef doesn’t need to be an extravagant affair. By focusing on affordable cuts, simple grilling techniques, and strategic portioning, you can enjoy the rich, indulgent flavors of this premium beef without going over budget. Whether it’s a casual weekday dinner or a weekend BBQ with friends, Wagyu offers an unforgettable taste that elevates any grilling session. Now’s the time to fire up the grill, try these ideas, and discover just how versatile and accessible Wagyu beef on the grill can truly be.
Want to cook Wagyu like a true barbecue master? Join the specialized online grilling classes taught by celebrated grill masters here at BBQ Champs Academy. You'll gain the expertise to master your grill or smoker and elevate your outdoor cooking like never before.
Plus, make sure to check out the BBQ Champs YouTube channel for a constant stream of cutting-edge barbecue tips and information, delivered by the champions themselves. Join our community and stay updated by clicking "Subscribe"!


