


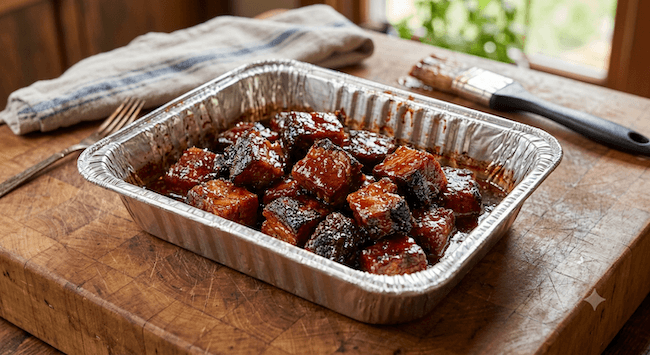
Often referred to as BBQ gold, true Kansas City-style burnt ends are arguably the single best bite in all of low-and-slow barbecue. Rendered from the rich, heavily marbled point muscle of a full packer brisket, a proper burnt end should melt in your mouth, delivering a crisp, caramelized bark with a rich, pillow-tender interior.
However, because these delicious bite-sized pieces undergo a two-step cooking process, it is all too easy for them to dry out, turn chewy, or transform into tough, rubbery nuggets. If you have been struggling with dry results on pit day, knowing how to keep burnt ends tender comes down to fat rendering, proper pan-braising, and mastering moisture retention.
In this article, we will break down the essential steps, pitmaster techniques, and crucial braising methods needed to ensure your burnt ends stay juicy, flavorful, and melt-in-your-mouth soft every single time.
You cannot achieve tender burnt ends without starting with the right source of fat and connective tissue.
Burnt ends should always be made from the brisket point, which is the thick, highly marbled top muscle of a whole packer brisket, rather than the leaner flat. The flat muscle lacks the intramuscular fat necessary to withstand a long, two-stage cook without completely drying out.
When selecting your beef brisket:
Understanding basic muscle structure and purchasing the right grade of beef is a foundational skill; exploring the details of USDA beef grading standards can help you select a brisket with enough internal marbling to stay juicy throughout an extended cook.

The secret behind keeping burnt ends tender lies in the transition from the smoker grate to the braising pan.
Cook your whole packer brisket (or separated point) until the internal temperature reaches roughly 195 Degrees Fahrenheit to 200 Degrees Fahrenheit and the bark is well-established. At this stage, the heavy collagen in the point has begun to break down, but the meat needs a second phase to soften entirely without losing moisture.
Remove the point from the smoker and let it rest briefly so the juices settle. Slice the point into 1-inch to 1.5-inch cubes. Keep the cubes uniform; if some cubes are half an inch while others are two inches, the smaller pieces will dry out long before the larger ones soften.
Place your cubed brisket point into a disposable foil pan. This is where the magic happens. To lock in moisture during the second cook:
Mastering temperature control and pit management prevents moisture loss during both stages of the cook.
For precise safety guidelines regarding internal beef cooking temperatures and resting protocols, check the Food Safety and Inspection Service resources.

Once your covered pan of burnt ends has simmered for an additional 1 to 1.5 hours and the cubes are probe-tender (like pushing a toothpick into warm butter), remove the foil cover for the last 10 to 15 minutes to let the sauce tack up.
Before serving, give the pan a short rest. Grasping the science behind resting meat explains how muscle fibers relax and reabsorb liquid as temperatures cool slightly, ensuring that first bite stays extraordinarily tender and rich.
Learning how to keep burnt ends tender and produce melt-in-your-mouth cubes consistently takes patience, exact timing, and proper braising techniques. By choosing a well-marbled point, cubing uniformly, and sealing in moisture with high-quality fats and sweet glazes, you will turn out burnt ends that rival the best smokehouses in Kansas City.
Want to learn the exact, guarded recipes and brisket prep techniques used by world champions (and learn how to master other cuts!)? Grab your All Access Pass today at BBQ Champs Academy to get step-by-step video training taught by legendary Pitmasters and Grillmasters!


